Welcome to my blog and thanks for reading. I post as often as I can listing upcoming events, interesting projects I am working on and some tips or two on using my favourite material - clay! If there is something you would like me to blog about, please send me a note. Please visit my website for more images of my work and an updated listing of events and happenings - http://www.taralynnefranco.com/


Monday, October 14, 2013

Waxing and Wiping and Rollerblades Oh My!

It has been a busy few weeks full of tons of activity both at the college and away.  There is so much to share, I probably should have done multiple posts.  Alas, I'll try to be brief.  Message me if you want more information about any of the things I've posted about.

First up, I spent a great weekend in late September in Edmonton at Clayworks Studio Link. They hosted a fantastic hands-on workshop with Austin Texas artist (and comedian) Ryan McKerley.


Ryan uses a technique called water carving where he paints a pattern onto a bone dry pot with hot parafin wax (Gulf wax in the US) which acts as a resist.  He then washes away the clay around it with a sponge and lots of water which leaves a raised surface where the wax is.

     
He was right when he said he makes it look very easy.  After 3 tries I finally had some successful pieces.

The following weekend (October 3 - 5) was spent at the Alberta College of Art and Design where the annual 1,000 Miles Apart conference was being held.  I got to see Ryan McKerley in action once again as well as Kansas City artist Steven Gorman


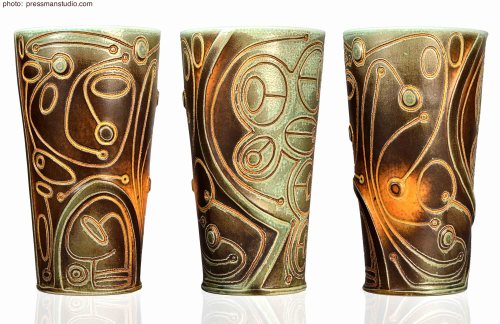
Ryan demonstrated his brand new spray paint technique.  One of our RDC students, Chase, was the lucky volunteer assistant.


And so, returning to Red Deer, I  had to try my hand at this.  Instead of using a gloss, I tried using some florescent spray paint I found in the sculpture studio. This left an interesting residue on the piece at the bisque phase as pictured below.  I will see if this remains after firing in reduction with an amber celadon on it.


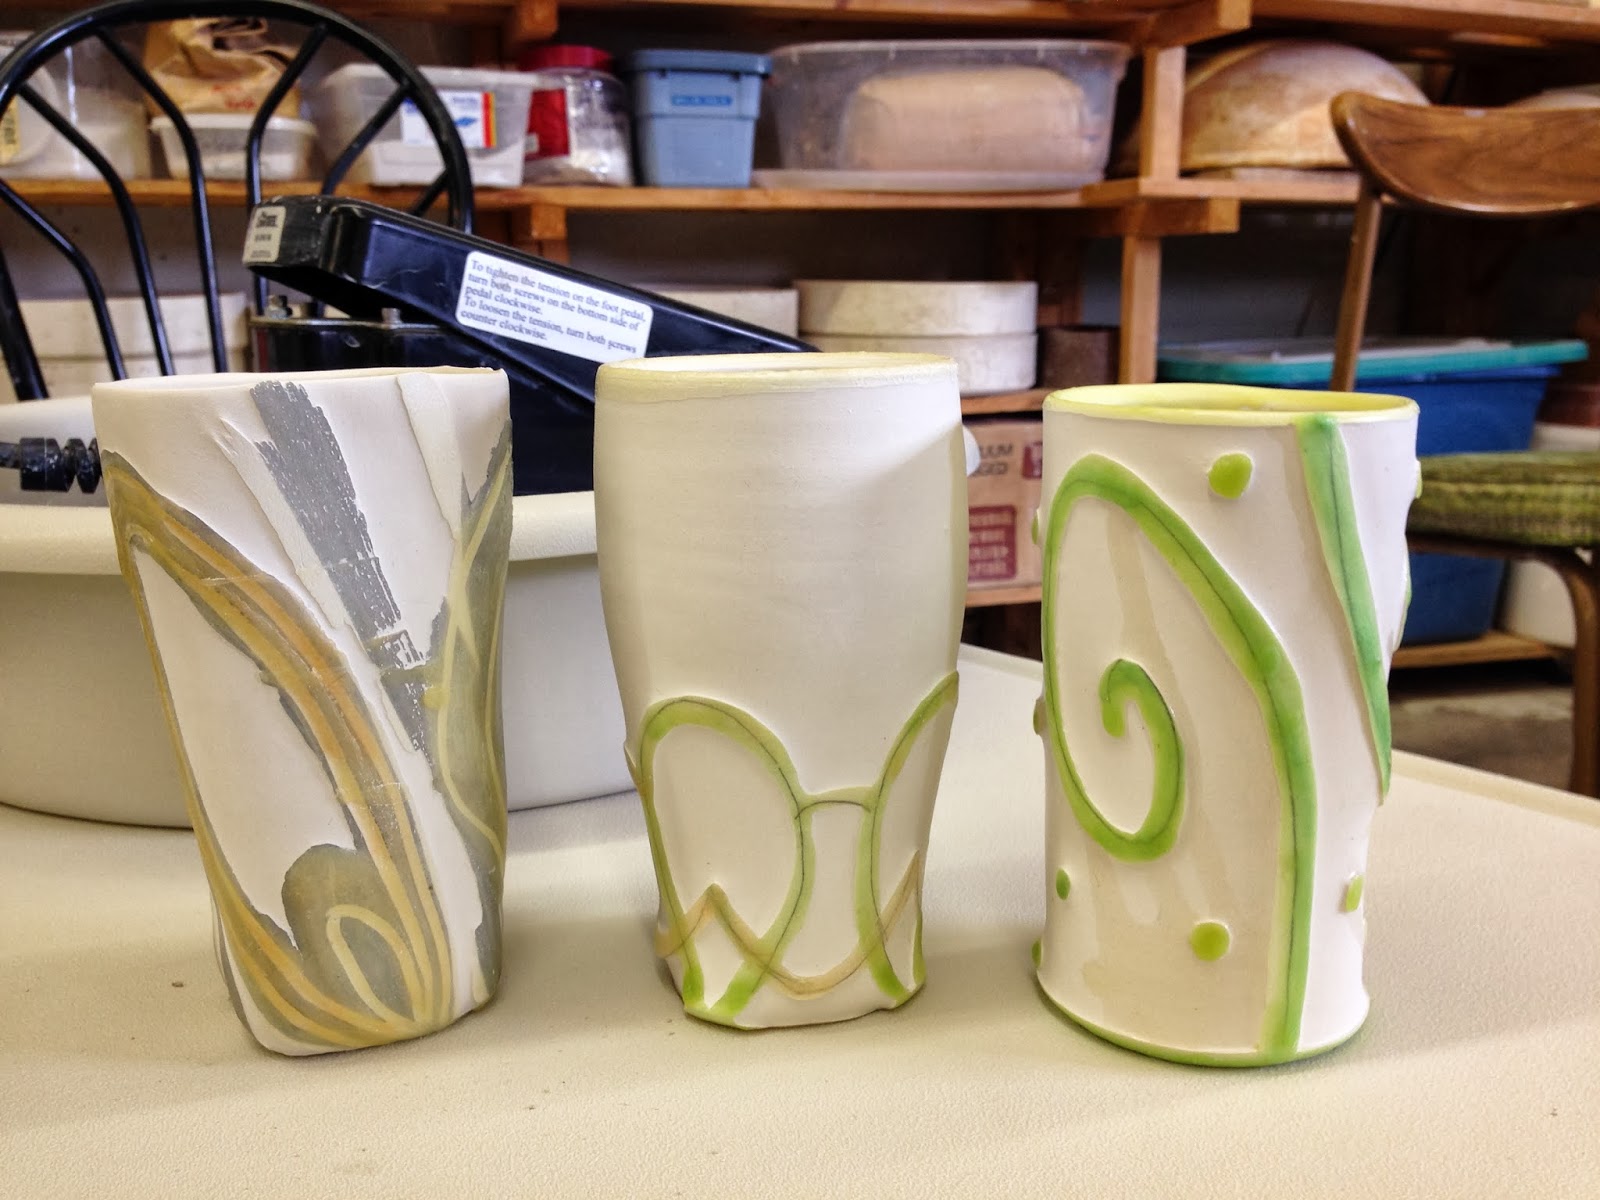
This week Trudy demonstrated a technique for throwing large pots with a tool made with Roller Blade wheels.


I started the process by throwing a base that had 1/2 inch thick wall on it on a plaster bat. We then added thick extruded coils one at a time and used the tool to compress and "throw" the coil onto the pot.  I have a video but it isn't working.  Darn.  And here's the final pot!  I threw one of the coils and then then finished by throwing a rim.  


My next clay adventure ... the zoomorphic vessel!


Sunday, September 15, 2013

Bowled Over

Next week I will be giving a demonstration on throwing bowls to the second year Ceramics students so I thought I would throw a few bowl styles to have trimmed and finished so they can see where it starts wet and where it can end up after altering, trimming and finishing.  Here are a couple I made today.  I also made a rimmed bowl and what I call a tulip bowl.

To make this style I made a simple upright bowl. I then cut out a section, textured it and re-added it to the bowl.  I altered the rim and pressed it in.   I think next time I will make a more obvious shape for the cut out similar to the cups I made last weekend which I will post as well.  This bowl was made with Coleman Porcelain, Cone 10.

I then took some Plainsman H440 and threw a similar bowl.  I made small balls of the Coleman Porcelain and attached them in a regular pattern.


I then pressed into those balls of clay with the end of a wood skewer and here are the results - a quilted look with contrasting clays.


Transferring a Pattern or Text to Clay and Soft Slab Construction


I learned a little tip this week - how to transfer a pattern, text or image to clay from paper.  This was originally shown to me as a way of transferring text to clay to make a "chop" so that the text is backwards, but I used this method to transfer a pattern I drew on newsprint to a rolled slab to make a hand-built spout for a soft slab vessel I made today.  First you draw out your pattern or text onto newsprint or other paper.  Trace over the design with a non-permanent Staedtler marker.  Then place the paper face down on your clay, rub over the surface where the line is and ta da ... the image or text is transfered!  I had a video but I cannot seem to post it.

Here is the final soft slab pot I created.  the body shape was inspired by a Margaret Bohls teapot. Check out this link for instructions on how to make her teapot on Ceramic Arts Daily.  http://ceramicartsdaily.org/pottery-making-techniques/handbuilding-techniques/drawing-in-space-how-to-handbuild-an-expressive-teapot-set-using-soft-slabs/

The body was made with an oval slab and 4 triangle shapes were cut from the top and then the pieces attached to each other, narrowing the top and creating pointed darts in four sections.

I added a textured section on the top, a hand-built spout I made from a paper pattern roughly the shape of a whale tail (also inspired by Margaret Bohl's teapot), and finally a curled handle and  feet to lift it off the table.  A little bit more texture and lines and it was complete.

Not bad considering I was going to give up after I completed the darting!

Tuesday, September 10, 2013

Red Deer Residency


It's been a long time since I posted but I hope to improve as I embark on a new journey in clay... My Red Deer Residency.

I've moved across the country to Red Deer Alberta where I've taken a post as the Ceramics Technician at Red Deer College in the Visual Arts department.  I have a fantastic state-of-the-art facility to work in as well as my own dedicated studio space to call my own. 

Red Deer College Throwing Room
Ceramics is headed up by Trudy Golley (www.alluvium.ca).


Aurora
Trudy Golley
I am looking forward to being inspired by Trudy, her work, and the many lectures and demonstrations she will give over the course of the next 9 months. I plan to do most, if not all of the projects she gives her classes as a way of trying out new techniques and new forms. 

Let the creative journey begin....

Thursday, February 17, 2011

New City Church Chalice Set

I am thrilled to have completed a very special commission for a wonderful local church in Hamilton - New City Church http://www.newcity-church.com/ - which is led by Pastor Connan Kublick. I designed and carved a custom stamp based on an illustration by a local artist and produced a set of 4 chalices and 2 lidded wine pitchers in white porcelain. These pieces had their debut this past weekend. It was a great honour to be asked to produce this lovely set.